How to Draw a Volleyball: Step-by-Step Guide for Beginners
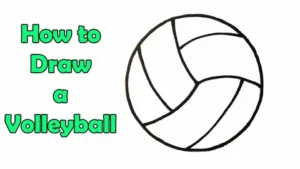
0
Ever wanted to learn how to draw a volleyball but didn’t know where to start? Whether you're a sports enthusiast, an artist, or someone simply looking for a fun activity, learning to draw a volleyball can be both rewarding and surprisingly easy! This guide will walk you through the process, breaking it down step-by-step. We’ll cover everything you need to create a realistic, visually engaging volleyball drawing.Let’s get started, grab your pencils, and jump into the world of drawing!

Materials You’ll Need

To draw a volleyball, you don’t need much, but here are some basics:

Pencil: A good quality pencil for sketching.
Eraser: Essential for correcting mistakes.
Fine-tipped Marker or Pen: For outlining.
Paper: Any smooth paper works well.
Colored Pencils or Markers: Optional but recommended for a realistic look.

How to Draw a Volleyball: Step-by-Step Instructions

Step 1: Draw the Basic Circle Shape
Start with a Circle
The volleyball is essentially a sphere, so begin by drawing a neat circle. You can freehand it or use a compass for accuracy.

Check the Proportions

Make sure the circle is proportionate. It doesn’t need to be perfect, but try to avoid uneven lines that may throw off the symmetry.

Lightly Sketch
Use light pencil strokes so that you can erase if necessary without leaving marks.

Step 2: Divide the Circle into Sections

Draw the Horizontal Curve
Lightly sketch a curved line across the middle of the circle to start creating the panel sections. This will be the horizontal band often seen on a volleyball.

Draw the Vertical Curves
Draw two more slightly curved lines, one on each side of the horizontal curve. These lines should create three primary sections within the circle that mimic the typical panels of a volleyball.

Erase the Overlapping Lines
Now, lightly erase any overlapping lines where the curves meet at the edges of the circle. You should have a clean look with the main volleyball sections starting to take shape.

Step 3: Add Details to Each Section

Define the Panels
Each section on a volleyball typically has a slightly different shape. Make the left and right sections slightly narrower than the central one.

Add Shading Lines
Draw parallel lines within each section. These lines represent the stitches or seams of the volleyball panels. Make sure to angle them to follow the curve of the ball, as this will give your volleyball a three-dimensional look.

Step 4: Outline and Refine the Details

Outline the Panels
Once your sections and details are defined, use a fine-tipped pen or marker to go over the pencil lines carefully. This will give your drawing a crisp and polished look.

Erase Pencil Lines
After outlining, gently erase any remaining pencil lines. Be careful not to smudge your ink or marker lines.

Refine the Lines
Thicken the outer edge of the volleyball if you want a bolder look, which can make it stand out more on paper.

Adding Realistic Shading to the Volleyball

Step 5: Create Shading for Dimension
Identify Your Light Source
Decide where the light is coming from, such as the top-left or right. This will determine where your shadows and highlights go.

Shade the Opposite Side
Lightly shade the sections of the ball that are opposite the light source. This creates the illusion of roundness and depth.

Blend for Smooth Transitions
Use your pencil to blend the shading, gradually moving from dark to light. You can use a blending stump or tissue to smooth out the transitions.

Step 6: Add Final Touches and Highlights
Add Highlights
Leave a small portion of the volleyball free from shading to indicate where light hits the ball. This gives it a glossy, realistic finish.

Darken the Seams
Go over the seams or edges of each section with a slightly darker shade, adding more contrast to make the volleyball appear more three-dimensional.

Optional: Add Color
If you want, use colored pencils or markers to bring your volleyball to life. Standard volleyballs often have white, yellow, and blue sections, but feel free to get creative.

Tips and Tricks for Perfecting Your Volleyball Drawing

Here are a few pro tips to make sure you end up with a top-notch drawing:

Practice Curved Lines: Drawing curves that follow the shape of a sphere can be tricky, so don’t hesitate to practice a few times.
Use Light Pressure: Keeping your pencil lines light will make it easy to correct any mistakes as you go.
Reference Real Volleyballs: If possible, look at an actual volleyball or photos to study the pattern and texture.
Take Your Time: Don’t rush through the shading and panel details—this is what makes your drawing pop!

## Common Mistakes to Avoid When Drawing a Volleyball

Even though learning how to draw a volleyball isn’t overly complicated, there are a few pitfalls to avoid:

Skipping the Light Source
Shading without a clear light source can make your drawing look flat and inconsistent.

Overdoing the Outlines
Thick outlines can make the volleyball look cartoonish, so aim for natural, varied lines.

Ignoring Symmetry
Try to keep each panel section fairly even for a balanced look.

Using Too Much Pressure
Heavy pencil lines can be hard to erase and may make the final drawing look messy.

FAQs About Drawing a Volleyball

Q1: How can I draw a volleyball without a compass?
Sure! You can trace around a round object like a cup or use a light hand and practice drawing circles freehand.

Q2: What colors should I use for a realistic volleyball drawing?
Traditional volleyballs are often white, blue, and yellow. You can also go for an all-white look if you’re aiming for a classic appearance.

Q3: How do I draw the stitching on the volleyball?
Create curved lines that follow the shape of the panels. They should be spaced evenly and angled to give the ball a three-dimensional look.

Q4: Can I use pens or markers instead of pencils?
Yes, but keep in mind that pencils allow for better control over shading. Markers and pens work best for outlining.

Q5: How can I make my volleyball drawing look more realistic?
Focus on your shading and highlights, which add depth. Keeping the panel lines consistent and subtle also helps.

Conclusion

There you have it—a complete guide on how to draw a volleyball from start to finish! With just a few basic shapes, some shading, and a little attention to detail, you can create a realistic and polished volleyball drawing. Remember, drawing is a skill that improves with practice, so don’t be discouraged if it takes a few tries to get it just right.

Now that you know how to draw a volleyball, try adding your own twist, experimenting with colors or patterns, and most importantly, have fun with the process. Happy drawing!
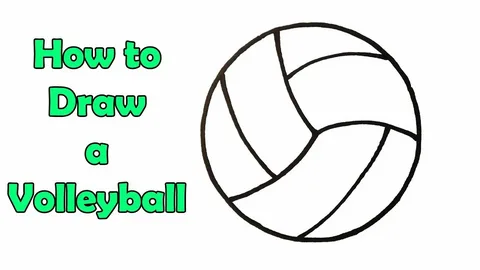
How to draw a volleyball

Ever wanted to learn how to draw a volleyball but didn’t know where to start? Whether you’re a sports enthusiast, an artist, or someone simply looking for a fun activity, learning to draw a volleyball can be both rewarding and surprisingly easy! This guide will walk you through the process, breaking it down step-by-step. We’ll cover everything you need to create a realistic, visually engaging volleyball drawing.

Let’s get started, grab your pencils, and jump into the world of drawing!

Materials You’ll Need

To draw a volleyball, you don’t need much, but here are some basics:

Pencil: A good quality pencil for sketching.
Eraser: Essential for correcting mistakes.
Fine-tipped Marker or Pen: For outlining.
Paper: Any smooth paper works well.
Colored Pencils or Markers: Optional but recommended for a realistic look.

How to Draw a Volleyball: Step-by-Step Instructions

Step 1: Draw the Basic Circle Shape
Start with a Circle
The volleyball is essentially a sphere, so begin by drawing a neat circle. You can freehand it or use a compass for accuracy.

Check the Proportions

Make sure the circle is proportionate. It doesn’t need to be perfect, but try to avoid uneven lines that may throw off the symmetry.

Lightly Sketch
Use light pencil strokes so that you can erase if necessary without leaving marks.

Step 2: Divide the Circle into Sections

Draw the Horizontal Curve
Lightly sketch a curved line across the middle of the circle to start creating the panel sections. This will be the horizontal band often seen on a volleyball.

Draw the Vertical Curves
Draw two more slightly curved lines, one on each side of the horizontal curve. These lines should create three primary sections within the circle that mimic the typical panels of a volleyball.

Erase the Overlapping Lines
Now, lightly erase any overlapping lines where the curves meet at the edges of the circle. You should have a clean look with the main volleyball sections starting to take shape.

Step 3: Add Details to Each Section

Define the Panels
Each section on a volleyball typically has a slightly different shape. Make the left and right sections slightly narrower than the central one.

Add Shading Lines
Draw parallel lines within each section. These lines represent the stitches or seams of the volleyball panels. Make sure to angle them to follow the curve of the ball, as this will give your volleyball a three-dimensional look.

Step 4: Outline and Refine the Details

Outline the Panels
Once your sections and details are defined, use a fine-tipped pen or marker to go over the pencil lines carefully. This will give your drawing a crisp and polished look.

Erase Pencil Lines
After outlining, gently erase any remaining pencil lines. Be careful not to smudge your ink or marker lines.

Refine the Lines
Thicken the outer edge of the volleyball if you want a bolder look, which can make it stand out more on paper.

Adding Realistic Shading to the Volleyball

Step 5: Create Shading for Dimension
Identify Your Light Source
Decide where the light is coming from, such as the top-left or right. This will determine where your shadows and highlights go.

Shade the Opposite Side
Lightly shade the sections of the ball that are opposite the light source. This creates the illusion of roundness and depth.

Blend for Smooth Transitions
Use your pencil to blend the shading, gradually moving from dark to light. You can use a blending stump or tissue to smooth out the transitions.

Step 6: Add Final Touches and Highlights
Add Highlights
Leave a small portion of the volleyball free from shading to indicate where light hits the ball. This gives it a glossy, realistic finish.

Darken the Seams
Go over the seams or edges of each section with a slightly darker shade, adding more contrast to make the volleyball appear more three-dimensional.

Optional: Add Color
If you want, use colored pencils or markers to bring your volleyball to life. Standard volleyballs often have white, yellow, and blue sections, but feel free to get creative.

Tips and Tricks for Perfecting Your Volleyball Drawing

Here are a few pro tips to make sure you end up with a top-notch drawing:

Practice Curved Lines: Drawing curves that follow the shape of a sphere can be tricky, so don’t hesitate to practice a few times.
Use Light Pressure: Keeping your pencil lines light will make it easy to correct any mistakes as you go.
Reference Real Volleyballs: If possible, look at an actual volleyball or photos to study the pattern and texture.
Take Your Time: Don’t rush through the shading and panel details—this is what makes your drawing pop!

## Common Mistakes to Avoid When Drawing a Volleyball

Even though learning how to draw a volleyball isn’t overly complicated, there are a few pitfalls to avoid:

Skipping the Light Source
Shading without a clear light source can make your drawing look flat and inconsistent.

Overdoing the Outlines
Thick outlines can make the volleyball look cartoonish, so aim for natural, varied lines.

Ignoring Symmetry
Try to keep each panel section fairly even for a balanced look.

Using Too Much Pressure
Heavy pencil lines can be hard to erase and may make the final drawing look messy.

FAQs About Drawing a Volleyball

Q1: How can I draw a volleyball without a compass?
Sure! You can trace around a round object like a cup or use a light hand and practice drawing circles freehand.

Q2: What colors should I use for a realistic volleyball drawing?
Traditional volleyballs are often white, blue, and yellow. You can also go for an all-white look if you’re aiming for a classic appearance.

Q3: How do I draw the stitching on the volleyball?
Create curved lines that follow the shape of the panels. They should be spaced evenly and angled to give the ball a three-dimensional look.

Q4: Can I use pens or markers instead of pencils?
Yes, but keep in mind that pencils allow for better control over shading. Markers and pens work best for outlining.

Q5: How can I make my volleyball drawing look more realistic?
Focus on your shading and highlights, which add depth. Keeping the panel lines consistent and subtle also helps.

Conclusion

There you have it—a complete guide on how to draw a volleyball from start to finish! With just a few basic shapes, some shading, and a little attention to detail, you can create a realistic and polished volleyball drawing. Remember, drawing is a skill that improves with practice, so don’t be discouraged if it takes a few tries to get it just right.

Now that you know how to draw a volleyball, try adding your own twist, experimenting with colors or patterns, and most importantly, have fun with the process. Happy drawing!


Leave A Reply

Your email address will not be published.

This website uses cookies to improve your experience. We'll assume you're ok with this, but you can opt-out if you wish. Accept Read More